![]()
![]()
The kdb Visual Studio Code extension provides developers with an extensive set of features that enables them to create and edit q files, connect to multiple kdb processes, and execute queries.
This extension can be used with kdb Insights Enterprise when using a shared kdb process.
Please email vscode-questions@kx.com to raise any questions or provide feedback.
This guide provides information on the following:
- Benefits of using kdb VS Code Extension
- Getting Started
- Creating and managing connections
- kdb language server
- Executing code
- Data sources
- Workbooks
- Query History
- Viewing results
- q REPL
- Settings
- Shortcuts
With the kdb VS Code extension you can:
- Install q.
- Write q syntax with support for syntax highlighting, predict and autocomplete.
- Write and execute q from a single line of code, code block or q file.
- Write and execute q and Python code against kdb Insights Enterprise.
- Connect to one or more q process or kdb Insights Enterprise deployment.
- Use a KX data source to choose a connection, specify the parameters and run API requests, SQL or qSQL.
- Use a KX workbook to choose a connection and run q or Python code against any connection.
- View results from your queries.
To get started you must do the following:
This section assumes you have already installed VS Code.
Install the kdb VS Code extension by clicking Install on this page.
- If q is already installed the message q runtime installed is displayed and you can go directly to adding connections.
- If q is not installed the message Local q installation not found is displayed. If this is the case go to the instructions for installing q.
Once the kdb VS Code extension is installed KX appears in the Activity Bar on the left-hand side and when it is selected the following views are displayed in the primary sidebar:
After you install kdb VS Code extension, if q is not already installed the extension provides a seamless integration with q, by displaying a notification with an option to download, register and install kdb Insights Personal Edition. For details on the other versions available see here.
-
Click Install new instance. If the prompt is not visible ensure the kdb extension is selected in the Activity bar on the left, if that does not display the prompt, close and re-open VS Code.

-
A dropdown is displayed with the two options:
- Select/Enter a license - If you have already registered for any of the versions of q available choose this to enter the license details.
- Acquire license - If you haven't yet registered for q, click this to open a dialog with a redirect link to register for kdb Insights Personal Edition.


Once registered you will receive an email with you license details. The base64 encoded license string can be found in the welcome email received after registration, under the download link for the license file.
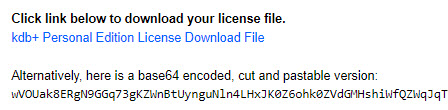
With your license details to hand, you can link this to VS Code by either choosing Paste license string or Select license file from your PC. The latter method is recommended for new users.

The k4.lic or kc.lic license file can be downloaded to your PC using the link also found in the welcome email.
To finish, a prompt is offered with an opt-in to receive a newsletter.
If you want to use q outside of VS Code, set a QHOME environment variable to the location used by the kdb VS Code install. A notification dialog displays the location of q, as do the extension settings.

If q is installed at C:\q, then QHOME is C:\q.
There are commercial and non-commercial editions available. We recommend you start with the kdb+ Personal Edition or kdb Insights Personal Edition. The following table lists the editions with links to downloads and the functionality they support.
| Edition | write q | run q queries | explore results | shared kdb process with kdb Insights |
|---|---|---|---|---|
| kdb+ Personal Edition | yes | yes | yes | no |
| kdb Insights Personal Edition | yes | yes | yes | no |
| kdb Insights Enterprise | yes | yes | yes | yes |
kdb Insights Enterprise requires a commercial license. Please contact licadmin@kx.com for further information.
After registering for your chosen version, you will receive an email with a link to download an installation file and a k4.lic or kc.lic license file. Follow the instructions here for Linux, macOS and Windows to install q and a license file before proceeding.
The kdb VS Code extension allows you to have multiple connections open at once, enabling development and testing across different q and kdb Insights Enterprise connections using both q and Python.
To add connections:
-
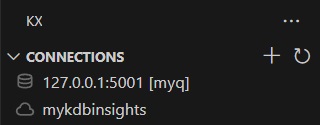
Select the KX extension from the Activity Bar to display the CONNECTIONS view.
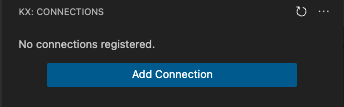
-
When you first install the extension there are no connections so click Add Connection. If you have already created connections click + for New Connection in the CONNECTIONS menu.

This opens the Add a new connection screen which has three tabs; one for each of the three connection types.
- Bundled q: This is a managed q session, which uses the q installed as part of the kdb VS Code extension installation. It runs a child q process from within the extension and is fully managed by the extension.
- My q: This is an unmanaged q session and is a connection to a remote q process.
- Insights: This accesses kdb Insights Enterprise API endpoints and a user-specific scratchpad process within a kdb Insights Enterprise deployment.

-
Set the properties appropriate to the connection type as described in the following sections.

When you select Bundled q as the connection type and set the following properties:
| Property | Description |
|---|---|
| Server Name | The name is already set as local. |
| The connection address | This is already be set as 127.0.0.1 which corresponds to your localhost. |
| Port | Set the port for the kdb server. Ensure the port used doesn't conflict with any other running q process; e.g. 5002. Read here for more about setting a q port |
-
Click Create Connection and the connection appears under CONNECTIONS in the primary sidebar..
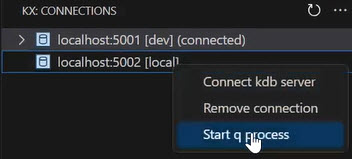
-
Right-click the q bundled process listed under CONNECTIONS, and click Start q process.

-
From the same right-click menu, click Connect server. This connects to the child q process running inside the kdb VS Code extension.
If you close the extension, the connection to the child q process also closes.
When you select My q as the connection type, identify the remote location of a running process. The hostname and port are required along with any authentication information.
Set the following properties:
| Property | Description |
|---|---|
| Server Name | The server name / alias. The server name selected cannot be local or insights, as these are reserved for use by Bundled q connections and Insights connections, respectively; e.g. dev |
| The connection address | Set to the IP address of the kdb server; e.g. localhost. |
| Port | Enter the port used by the kdb server; e.g. 5001. Learn more about setting a q port . |
| Username | If authentication is needed, fill in the username otherwise, leave blank |
| Password | If authentication is needed, fill in the password otherwise, leave blank |
| Enable TLS Encryption | Check the box is TLS is enabled. Learn more about TLS encryption. |
 .
.
-
Click Create Connection and the connection appears under CONNECTIONS in the primary sidebar.
-
Right-click the my q process listed under CONNECTIONS, and click Connect server. This connects to the child q process running inside the kdb VS Code extension.
If you close the extension, the connection also closes.
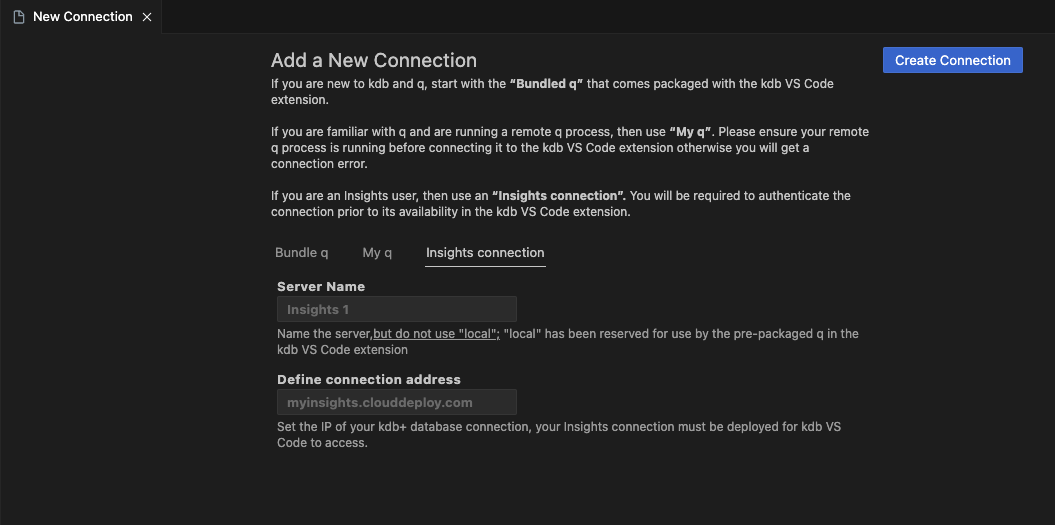
When you select Insights connection as the connection type, the kdb VS Code extension uses a shared kdb process. You must have kdb Insights Enterprise Personal Edition running before using connections of this type.
Set the following properties:
| Property | Description |
|---|---|
| Server Name | The server name / alias. This can be any name, aside from local, which is used by Bundled q connection |
| The connection address | This is the remote address of your kdb Insights Enterprise deployment: e.g. https://mykdbinsights.cloudapp.azure.com |
-
Click Create Connection and the kdb Insights Enterprise connection appears under CONNECTIONS in the primary sidebar.
-
Right-click the connection, and click Connect server.

-
The kdb VS Code extension runs an authentication step with the remote kdb Insights Enterprise process to sign-in.


If you close the extension, the connection also closes.
Once connected, go to execute code.
A kdb language server is bundled with the kdb VS Code extension. It offers various common features to aid in the development of kdb code, including:
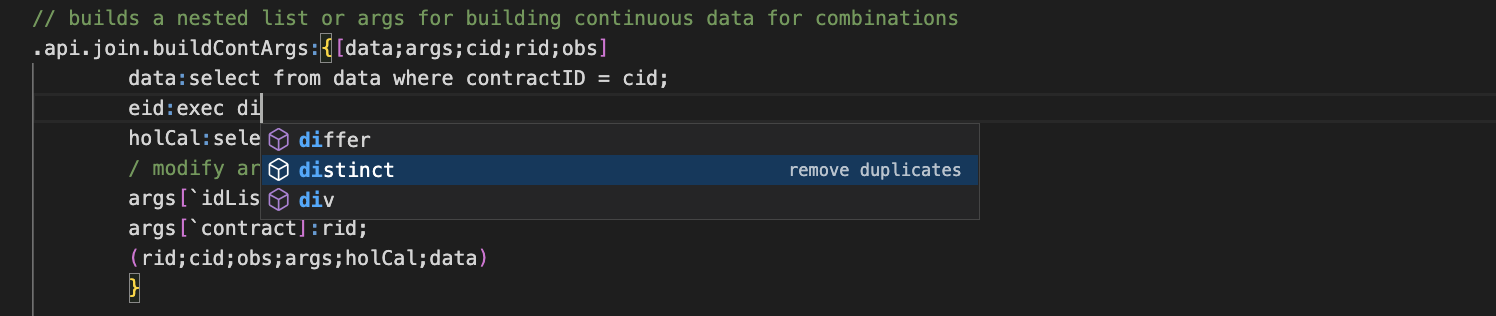
The extension provides keyword syntax highlighting, comments and linting help.
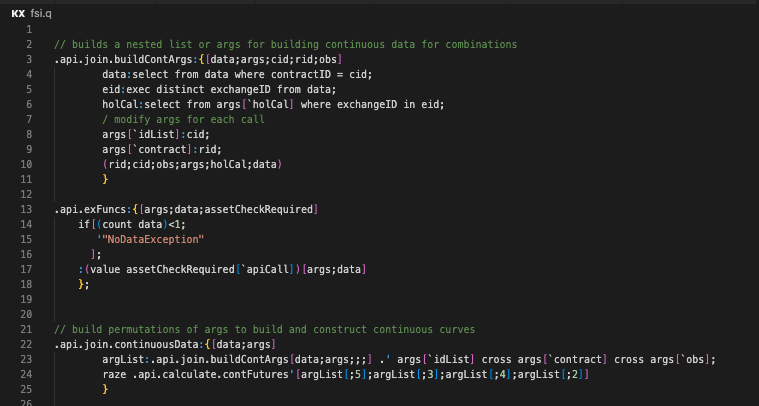
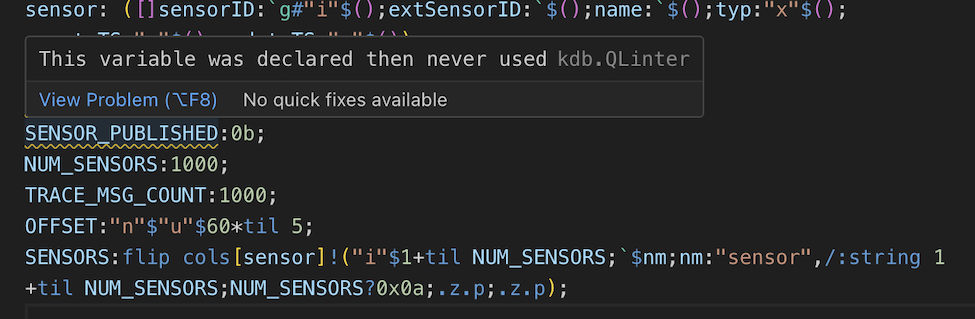
Linting can be enabled by checking Enable linting for q and quke files in extension settings.
While developing q scripts you can:
-
Go to definition - Navigate to the definition of a function.
-
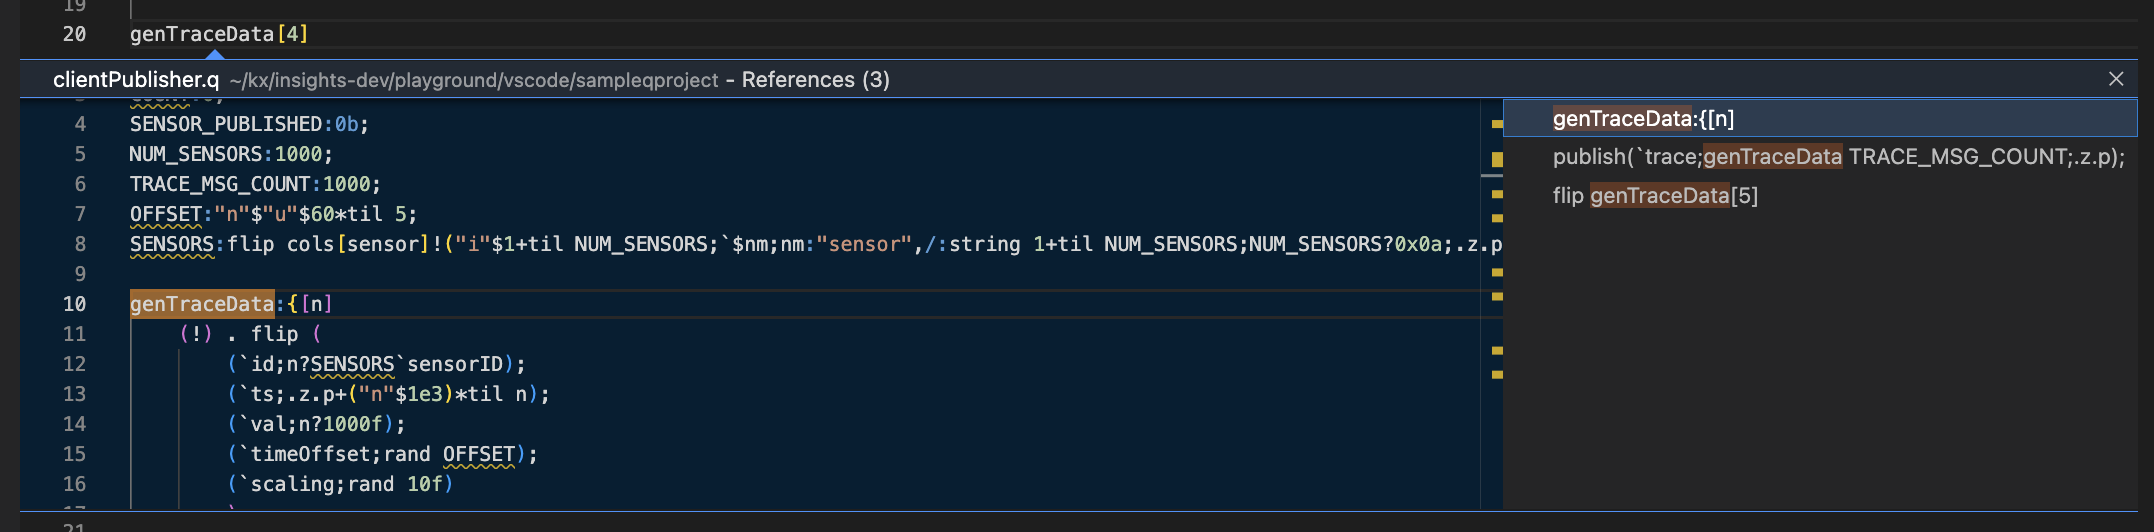
Find/go to all references - View references of a function both on the side view and inline with the editor.


-
Outline View - Use the Overview at the bottom of the explorer view which shows the symbol tree of the currently active q file.


-
Keyword auto complete for the q language

-
Autocomplete for local and remotely connected q processes
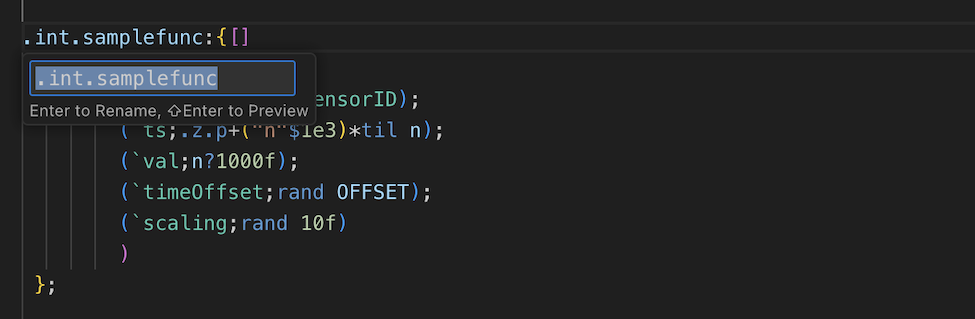
- Rename Symbol - Supports renaming symbols in the text editor. Right-click and select Rename Symbol on any identifier to rename it.
Leaning on VS Code's extensive integrations with SCMs, all code is typically stored and loaded into a VS Code workspace. From there, the kdb VS Code extension allows you execute code against both kdb processes, and kdb Insights Enterprise endpoints.
For any file with a .q or .py extension there are additional options available from the right-click menu for executing code:
-
Execute entire file - Takes the current file and executes it against the active connection. Results are displayed in the Output window. Returned data is displayed in the KDB Results window.
-
Execute current selection - Takes the current selection (or current line if nothing is selected) and executes it against the active connection. Results are displayed in the Output window and/or the KDB Results window.
-
Run q file in new q instance - If q is installed and executable from the terminal you can execute an entire q script on a newly launched q instance. Executing a file on a new instance is done in the terminal, and allows interrogation of the active q process from the terminal window.
kdb Insights Enterprise offers enhanced connectivity and enterprise level API endpoints, providing additional means to query data and interact with kdb Insights Enterprise that are not available with standard kdb processes. You must have an instance of kdb Insights Enterprise running, and have created a connection within the kdb VS Code extension.
Similarly, you can execute arbitrary code against kdb Insights Enterprise. The code is executed on a user-specific scratchpad process within the kdb Insights Enterprise deploy. The scratchpad is instantiated upon the first request to execute code when connected to a kdb Insights Enterprise connection. It remains active until timed out or until you log out.
KX data source files allow you to build queries within VS Code, associate them with a connection and run them against the kdb Insights Enterprise API endpoints. These are workspace specific files that have the following features:
- Listed in the DATASOURCES view in the primary sidebar
- Can be associated with a connection
- Have the kdb.json extension
- Are stored in a .kx folder at the root of your open folder
The data source screen helps you to build a query, based on the available API on your instance of kdb Insights Enterprise, parameterize it and return the data results to the output or kdb results window.
To create a data source and run it against a specific connection:
-
Ensure you have at least one folder open in VS Code.
-
In the DATASOURCES view, click + and specify the parameters defined in the following table:
Property Description Connection Select a Connection from the Connection dropdown. Select API Choose getData from the Select API dropdown. Table Choose the table you wish to query from the Tables dropdown. Start Time/End Time Select the Start Time and End Time for the query. Additional Parameters You can choose from the additional parameters as required. -
Click Save to store the settings you have chosen, for reuse later. When you save a data source; query parameters and the connection details are stored. The data source icon is green if it is associated with a connection and grey if there is no association.

-
Click Run.
-
The results are populated in the KDB Results window, if it is active.

-
Otherwise the Output window is populated.

-


In addition to API queries, if the query environment is enabled on the deployed instance of kdb Insights Enterprise, qSQL and SQL queries can be used within a data source with the appropriate parameterization. If qSQL or SQL is required and issues occur trying to run these queries contact a kdb Insights Enterprise administrator for assistance.
You can use a data source to populate a scratchpad process running in a kdb Insights Enterprise instance with a dataset. This allows you to then execute q or python code against the data stored in that variable in the scratchpad. This facilitates the generation of complex APIs and pipelines within VS Code and kdb Insights Enterprise.
To do this:
-
Create a data source and execute it by clicking Populate Scratchpad.

-
At the prompt, provide a variable to populate your own scratchpad instance running in the connected kdb Insights Enterprise with the data.

-
The scratchpad process is populated.
-
Use a Workbook to execute q or Python code against the data in your scratchpad using the variable you provided.


Workbooks provide a convenient way to prototype and execute q and python code against a q process and using the variables populated into the scratchpad of a kdb Insights Enterprise deployment by data sources.
Standard .q and .py files only run on the active connection. Workbook files have the following features:
- Are listed in the WORKBOOKS view in the primary sidebar
- Can be associated with a connection
- Have the .kdb.q. or kdb.py extension
- Are stored in a .kx folder at the root of your open folder
This allows you to have multiple Workbooks running against different connections at the same time.
To create a Workbook and run code against a specific connection:
-
Ensure you have at least one folder open in VS Code.
-
In the WORKBOOKS view in the primary sidebar, click the + for either a New q workbook or New Python workbook.

-
Write the code you wish to execute.
-
Run the code:
-
To run all the code in the file you can use one of the following methods:
-
Click Run from above the first line of code in the workbook file.

-
Select Run from the upper right of the editor. Using the dropdown next to the button you can choose to KX: Execute Entire File or KX Execute Current Selection.

-
Click Run on the right-hand side of the status bar.

-
Right-click and choose KX: Execute Entire File from the menu.
-
-
If you wish to only run the current selection (or current line if nothing is selected), right-click and choose KX: Execute Current Selection from the menu.
-
-
If you have not yet chosen a connection to associate with the workbook you are asked to choose a connection before the code is executed.

-
The results populate the kdb results window if it is active, otherwise the output window is populated.


When you save a workbook file the code and the connection details are stored. The workbook icon is green if it is associated with a connection and grey if there is no association.
You can also change the connection associated with a workbook at any time by clicking on Choose Connection from above the first line of code in the workbook file.

The Query History view in the primary sidebar captures each query execution and enables you to re-run any of the queries listed. Initially the query history view is empty but once you run a query it is captured and displayed in the window - with a separate row displayed for every execution. All information is stored in memory and not persisted upon application exit.

Rows consists of the following:
| Field | Description |
|---|---|
| Status icon | Shows if the code or query executed successfully or an error occurred. |
| Connection Name | The Server name associated with the connection on which the query was executed |
| Connection Type | The connection type showing either local, myq or insights. |
| Time | the time the query was executed. |
| Data Source/File/Workbook | The name of the file being executed. |
| Query | When Code is being execute the code is shown. |
| Data Source Type | When a datasource is being run 'API' is displayed. |

Right-clicking on a history row brings up a menu with the option to Rerun query.

All query executions happen remotely from the kdb VS Code extension either against a running q process or against your user-specific scratchpad process in kdb Insights Enterprise. The results, successful or otherwise, are returned to VS Code in one of the following windows:
-
Output - The Output window displays results as they are received by the kdb VS Code extension. It includes the query executed, a timestamp and the results.

Note: You can enable/disable auto-scrolling in the VS Code settings. This setting determines whether the output view scrolls to the latest results.

Note You can hide or show the full details in the console output. Go to settings of the VS Code, search for kdb, check the option Hide Detailed Console Query Output (this option is checked by default)

-
KDB Results - This window displays the kdb returned data in a table.


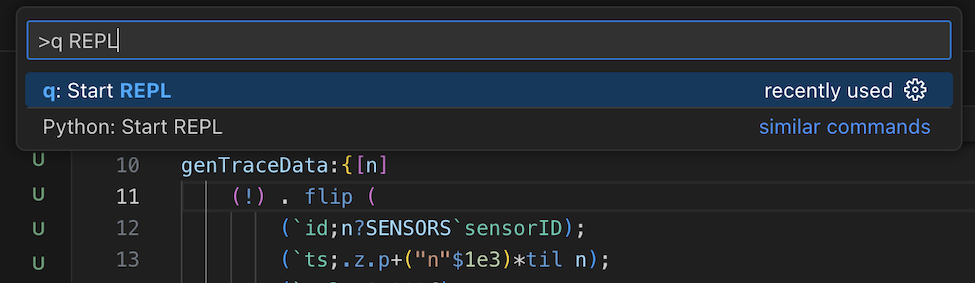
q REPL can be started from the command prompt by searching q REPL.
To update kdb VS Code settings, search for kdb from Preferences > Settings, or right-click the settings icon in kdb VS Code marketplace panel and choose Extension Settings.
| Setting | Action |
|---|---|
| Hide notification of installation path after first install | yes/no; default no |
| Hide subscription to newsletter after first install | yes/no; default no |
| Insights Enterprise Connections for Explorer | edit JSON settings |
| Linting | Enable linting for q and quke files |
| QHOME directory for q runtime | Display location path of q installation |
| Servers | edit JSON settings |
{
    "security.workspace.trust.untrustedFiles": "open",
    "editor.accessibilitySupport": "off",
    "workbench.colorTheme": "Default Dark+",
    "kdb.qHomeDirectory": "C:\\qhomedirectory",
    "kdb.hideInstallationNotification": true,
    "kdb.servers": {
        "23XdJyFk7hXb35Z3yw2vP87HOHFIfy0PDoo5+/G1o7A=": {
            "auth": true,
            "serverName": "127.0.0.1",
            "serverPort": "5001",
            "serverAlias": "5001",
            "managed": false
        }
    },
    "kdb.hideSubscribeRegistrationNotification": true,
    "kdb.insightsEnterpriseConnections": {

        "b61Z6R1TGF3vsudDAmo5WWDcGEmRQpmQKoWrluXJD9g=": {
            "auth": true,
            "alias": "servername.com",
            "server": "https://servername.com/"
        }
    }
}{
"security.workspace.trust.untrustedFiles": "open",
"editor.accessibilitySupport": "off",
"workbench.colorTheme": "Default Dark+",
"kdb.qHomeDirectory": "C:\\qhomedirectory",
"kdb.hideInstallationNotification": true,
"kdb.servers": {
"23XdJyFk7hXb35Z3yw2vP87HOHFIfy0PDoo5+/G1o7A=": {
"auth": true,
"serverName": "127.0.0.1",
"serverPort": "5001",
"serverAlias": "5001",
"managed": false
}
},
"kdb.hideSubscribeRegistrationNotification": true,
"kdb.insightsEnterpriseConnections": {
"b61Z6R1TGF3vsudDAmo5WWDcGEmRQpmQKoWrluXJD9g=": {
"auth": true,
"alias": "servername.com",
"server": "https://servername.com/"
}
}
}| Key | Action |
|---|---|
| F12 | Go to definition |
| Shift + F12 | Go to references |
| Ctrl + Shift + F12 | Find all references |
| Ctrl + D | Execute current selection |
| Ctrl + Shift + D | Execute entire file |
| Ctrl + Shift + R | Run q file in new q instance |
| Key | Action |
|---|---|
| F12 | Go to definition |
| Shift + F12 | Go to references |
| ⌘ + Shift + F12 | Find all references |
| ⌘ + D | Execute current selection |
| ⌘ + Shift + D | Execute entire file |
| ⌘ + Shift + R | Run q file in new q instance |